


Contents:
- Before You Shop: What to Assess About Your Pool Area First
- Sun Exposure and Heat
- Water Chemistry and Splash Zone
- Substrate Condition
- Step 1: Understand Slip Resistance Before Anything Else
- Step 2: Compare Your Material Options Honestly
- Porcelain Pool Tile
- Natural Travertine
- Pebble and Aggregate Finishes
- Common Comparison: Pool Deck Tile vs. Pebble/Aggregate Decking
- Step 3: Choose the Right Tile Size and Layout
- Step 4: Pick Your Waterline and Coping Tile Separately
- Step 5: Factor In Installation, Not Just the Tile Itself
- What the Pros Know
- Step 6: Match Tile Color to Your Pool’s Finish and Lighting
- Step 7: Budget Realistically for Materials and Labor
- Why We Approach Pool Deck Projects This Way
- FAQ: Choosing Tile for a Swimming Pool Area
- What is the safest tile for around a swimming pool?
- Is porcelain or travertine better for a pool deck in Florida?
- How often does pool deck tile need to be replaced?
- Can I install pool deck tile over existing concrete?
- How much does it cost to retile a pool deck in Tampa Bay?
Picture your kid running from the back door toward the pool on a July afternoon, towel flapping behind them. Does the deck under their feet grip like it should, or does it turn into a skating rink the second it gets wet? That single question — traction versus beauty, safety versus style — is the one most homeowners never think to ask until someone slips. It’s also the exact question this guide is built to answer.
Choosing pool deck and waterline tile isn’t the same as picking a floor for your kitchen. Between chlorine exposure, standing water, UV bleaching, and bare feet, a swimming pool area punishes flooring in ways most rooms never will. Get the material right and you’ll have a deck that looks sharp for fifteen years. Get it wrong and you’re re-tiling — or worse, filing an insurance claim — within three summers. This article walks through exactly how to pick tile for a swimming pool area, from prep work to final grout line, with real numbers and the kind of detail you only get from a crew that’s installed hundreds of pool decks around Tampa Bay.
For a Florida swimming pool area, choose porcelain or natural travertine with a slip-resistance rating (DCOF) of at least 0.60 for deck surfaces and 0.42+ for waterline tile that stays wet. Avoid polished porcelain and glossy ceramic on the deck entirely — they look great dry and become dangerous the moment they’re splashed. Budget roughly $12–$28 per square foot installed, depending on material and deck size, and always confirm the tile is rated for exterior, freeze-thaw-irrelevant, high-UV climates like Tampa’s.
We’re going to move through this the way we’d walk a client through it on-site: what to check before you buy a single tile, the step-by-step decision process, a couple of comparisons that trip people up, and the questions we get asked most often at tampa bay flooring consultations.
Before You Shop: What to Assess About Your Pool Area First
Most people start their tile search by browsing photos on Pinterest. That’s backwards. Start with your specific pool area instead, because three physical factors will eliminate half the options on the shelf before you even walk into a showroom.
Sun Exposure and Heat
A west-facing deck in Tampa can hit 140°F on concrete by 3 p.m. in August. Dark porcelain and dark travertine absorb heat fast and hold it. If your kids or dog will be walking barefoot across that deck at midday, lean toward lighter tones — cream, tan, soft gray — which stay measurably cooler to the touch. We’ve had clients bring back a sample tile from their own deck on a 95-degree day just to prove the point; the difference between a charcoal porcelain plank and a beige travertine paver can be 20 degrees or more.
Water Chemistry and Splash Zone
Map out where water actually lands. The first 3 feet around the coping gets soaked constantly. Beyond that, splash-out drops off fast. This matters because you don’t need the same slip rating everywhere — you need the highest traction closest to the water, and you can ease up slightly as you move toward the lounge area or covered lanai.
Substrate Condition
Existing concrete decks crack. Before ordering tile, have someone check for structural cracks (not just surface crazing), proper drainage slope away from the pool (should be about 1/4 inch per foot), and any efflorescence or old sealant that needs stripping. Skipping this step is the single most common reason pool deck tile fails within two years — not the tile itself, but what’s underneath it.
Step 1: Understand Slip Resistance Before Anything Else
This is where amateur pool renovations go wrong most often, so it earns its own step before we even talk about materials. Tile slip resistance is measured by DCOF (Dynamic Coefficient of Friction). The American National Standards Institute recommends a minimum DCOF of 0.42 for level interior surfaces expected to get wet — but pool decks aren’t level interior surfaces, they’re outdoor, sloped, and chronically wet, so the real-world target should be higher.
Ask any supplier for the DCOF rating in writing, wet-tested, not dry-tested. A tile that scores 0.55 dry might drop to 0.30 wet, and that’s the number that actually protects your family. For the deck itself, we generally won’t recommend anything under 0.60 wet. For pool steps and the first ring around the water, we push closer to 0.70.
Texture achieves this more reliably than chemical coatings. Look for tile described as “matte,” “textured,” “structured,” or “cobbled” finish rather than “polished” or “glazed.” Some manufacturers also stamp a slip-resistance icon (a shoe or a wave symbol) directly on the box — a fast way to sort options in a showroom.
Step 2: Compare Your Material Options Honestly
There are really four contenders for a Florida pool deck: porcelain, natural stone (travertine or granite), pebble/aggregate finishes, and traditional ceramic. Traditional ceramic can be crossed off immediately for deck use — it’s too porous and too slick when honed smooth, and it wasn’t engineered for freeze-thaw-irrelevant but UV-brutal climates like ours. That leaves three real contenders.
Porcelain Pool Tile
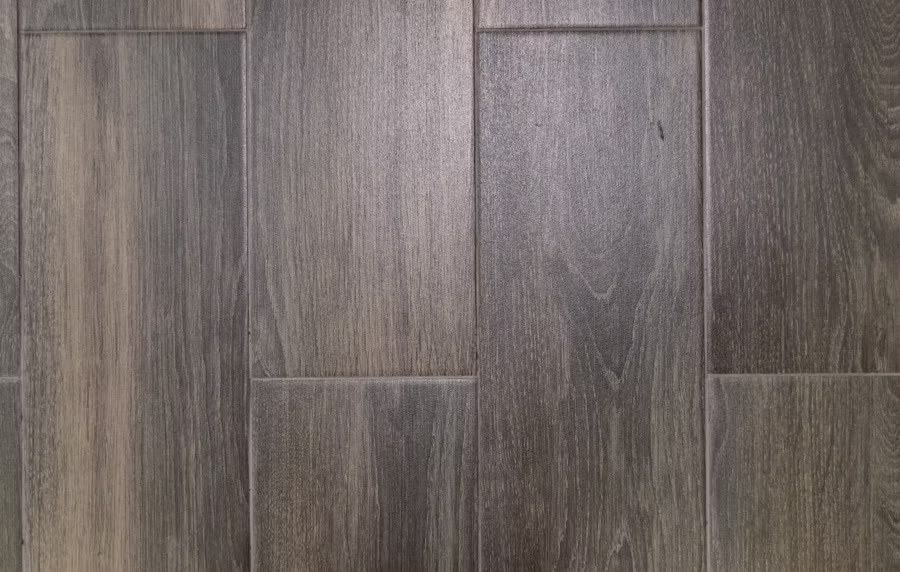
Modern through-body porcelain is our default recommendation for most Tampa Bay clients, and here’s the concrete reasoning: water absorption under 0.5%, meaning it essentially can’t stain or harbor algae the way natural stone can. It also holds color under UV exposure far longer than stone, which fades and chalks over a decade of Florida sun. Textured porcelain that mimics travertine or wood-look planks has gotten good enough in the last few years that most guests can’t tell the difference from three feet away.
Natural Travertine
Travertine is the classic Florida pool look — that warm, tumbled, slightly pitted stone you see around resort pools. It stays genuinely cooler underfoot than most porcelain because of its natural porosity, which is a real advantage for bare feet at noon. The tradeoff: it needs sealing every 1–2 years, it can etch from pool chemicals if you’re not careful with your chlorine levels, and it costs 15–25% more than comparable porcelain installed.
Pebble and Aggregate Finishes
These aren’t tile in the traditional sense, but they come up in every pool deck conversation, so it’s worth addressing directly.
Common Comparison: Pool Deck Tile vs. Pebble/Aggregate Decking
People frequently confuse “pool tile” with pebble-finish or exposed-aggregate decking, and they’re not interchangeable, so it’s worth untangling them here.
Pebble and aggregate finishes are poured, not installed as individual tiles — a cement base is troweled down and embedded with small stones, then the surface is washed to expose them. The result has excellent traction (arguably the best of any deck surface) and a natural look, but it’s rougher on skin, harder to patch if damaged (you’re matching a pour, not swapping a piece), and offers far less design flexibility — no clean grid lines, no border details, no pattern work.
Tile, by contrast, gives you precision: consistent sizing, the ability to run a herringbone pattern at the entry steps, a contrasting waterline band, or a decorative border around the coping. If your goal is a specific aesthetic — Mediterranean, modern minimalist, coastal — tile gets you there in a way poured aggregate can’t. If your absolute top priority is raw slip resistance above all else and design is secondary, aggregate is worth a look. For most of our clients wanting both safety and style, textured porcelain splits the difference well, which is why it dominates roughly 70% of the swimming pool tile installation jobs we run today.
Step 3: Choose the Right Tile Size and Layout
Size affects both safety and maintenance more than most people expect. Smaller format tile (2×2 inches up to about 6×6) means more grout lines, and grout lines add texture and traction — genuinely useful right at the pool’s edge and on steps. Larger format tile (12×24 and up) gives a cleaner, more modern look with fewer seams to clean, but on a sloped deck it can actually feel slicker because there’s less grout interruption per square foot.
Our general rule for deck layouts: use smaller-format or mosaic tile on steps and the first 18 inches from the water, then transition to larger format for the rest of the lounging deck. This isn’t just an aesthetic choice — it’s a functional safety gradient that most DIY pool renovations completely skip.
Step 4: Pick Your Waterline and Coping Tile Separately
The waterline tile (the narrow band that sits right at the pool’s water level) and the coping (the tile capping the pool’s edge) do different jobs than the deck tile, and they should be chosen with different criteria.
Waterline tile is submerged half the time and needs to resist calcium buildup and constant moisture — glass tile and porcelain mosaics both perform well here because of their near-zero absorption. Coping needs the highest slip resistance of the entire project since it’s the transition point between wet feet and dry deck; bullnose-edge porcelain or natural stone with a honed (not polished) finish is standard. Don’t default to matching all three surfaces exactly. A cohesive color palette across deck, waterline, and coping reads more intentional than an identical material used everywhere, and it lets you put your highest-traction product exactly where it’s needed most.
Step 5: Factor In Installation, Not Just the Tile Itself
Here’s something showrooms rarely mention: the tile itself is often less than half the total project cost, and the installation quality matters more for long-term performance than the brand on the box. Pool deck tile needs a proper crack-isolation membrane, correct thin-set for exterior/wet applications (not the same mortar used indoors), and expansion joints placed correctly around the pool’s perimeter to accommodate Florida’s ground movement.
This is where a lot of otherwise good tile choices fail. We’ve been called out to fix decks where beautiful, correctly-rated tile was installed with indoor thin-set and no expansion joints — cracked and lifted within 18 months, not because the material was wrong, but because the flooring installation tampa crew cut corners on substrate prep. When you’re getting quotes, ask specifically what membrane system and mortar type will be used before you compare prices on the tile alone.
What the Pros Know
Ask for the tile’s actual DCOF wet-test result before you commit to a color. Some of the most popular travertine-look porcelains on the market today score beautifully on paper but were dry-tested by the manufacturer. At Tampa Bay Floors, we keep a small tray of water on hand during every showroom visit and test candidate tiles ourselves, wet, with a bare hand pressed flat and dragged across the surface. It takes thirty seconds and it’s told more than one client to walk away from a tile they’d already fallen in love with. That’s the kind of detail you only catch when you’ve installed as many pool decks as we have.
Step 6: Match Tile Color to Your Pool’s Finish and Lighting
Deck color influences how the pool water itself reads. Lighter tan and cream tile bounces sunlight and makes turquoise-finish pools pop; darker gray or charcoal tile creates a more dramatic, almost lagoon-like water tone, especially paired with a dark pool interior. If you’re installing pool lighting for evening swims, test a sample tile under LED light at night before finalizing — color temperature shifts more dramatically outdoors after dark than most people expect, and a tile that looked warm gray in the showroom can read almost blue under certain LED fixtures.
Step 7: Budget Realistically for Materials and Labor
For a typical Tampa Bay residential pool deck (400–800 square feet), expect these rough ranges installed:
- Textured porcelain, mid-grade: $12–$18 per square foot
- Premium wood-look or large-format porcelain: $18–$24 per square foot
- Natural travertine, standard grade: $16–$22 per square foot
- Premium honed travertine or exotic stone: $24–$32 per square foot
- Waterline tile (linear foot, glass or porcelain mosaic): $18–$35 per linear foot
These numbers include demo of old surfacing, substrate repair, membrane, and installation labor — not just materials. Get itemized quotes so you can see exactly where your budget is going, and be wary of any bid that’s dramatically below these ranges; it usually means a step in substrate prep is being skipped.
Why We Approach Pool Deck Projects This Way
We’ve been doing https://tampabayfloors.us/services/outdoor-pools/swimming-pool-tile-installation across the Tampa Bay area long enough to have seen what actually holds up through a decade of Gulf Coast humidity, salt-system chlorination, and afternoon thunderstorms versus what just looks good on install day. Every deck we quote starts with a slope and drainage check, not a catalog. We test slip resistance wet, on-site, with the actual tile the client is considering, not a manufacturer’s spec sheet alone. And we use crack-isolation membrane and marine-grade thin-set on every exterior pool project as a baseline, not an upsell — because we’ve torn out too many decks that failed within two years for exactly that reason. That’s the difference between a deck that needs attention again in five years and one that’s still solid in twenty.
FAQ: Choosing Tile for a Swimming Pool Area
What is the safest tile for around a swimming pool?
Textured or matte-finish porcelain with a wet DCOF rating of 0.60 or higher is generally the safest choice for pool decks, with an even higher rating (0.70+) recommended for steps and the immediate splash zone. Avoid polished, glazed, or high-gloss tile anywhere near the water.
Is porcelain or travertine better for a pool deck in Florida?
Porcelain wins on stain resistance, color longevity under UV, and lower maintenance since it needs no sealing. Travertine wins on natural cool-underfoot comfort and classic aesthetic appeal but requires periodic sealing and costs more over its lifetime. Most young families choosing durability and lower upkeep lean porcelain; those prioritizing a resort-style natural look often choose travertine and accept the maintenance tradeoff.
How often does pool deck tile need to be replaced?
Properly installed porcelain or travertine on a well-prepped substrate can last 15–25 years in a Florida climate. Failures before the 5-year mark almost always trace back to substrate cracking, missing expansion joints, or improper mortar rather than the tile itself.
Can I install pool deck tile over existing concrete?
Yes, in most cases, as long as the existing concrete is structurally sound, properly sloped for drainage, and free of active cracking. A crack-isolation membrane should still be applied over the concrete before setting new tile to prevent existing stress cracks from telegraphing through.
How much does it cost to retile a pool deck in Tampa Bay?
For an average 500-square-foot residential deck, total project costs typically range from $7,000 to $16,000 depending on material choice, substrate condition, and whether waterline tile is being replaced at the same time. Getting a few itemized quotes lets you compare apples to apples on material grade and prep work rather than just a bottom-line number.